


Once your services have been approved in the Solution Provider Portal (SPP), as shown below, you can begin requesting access to the corresponding areas of a client’s Seller Central account.
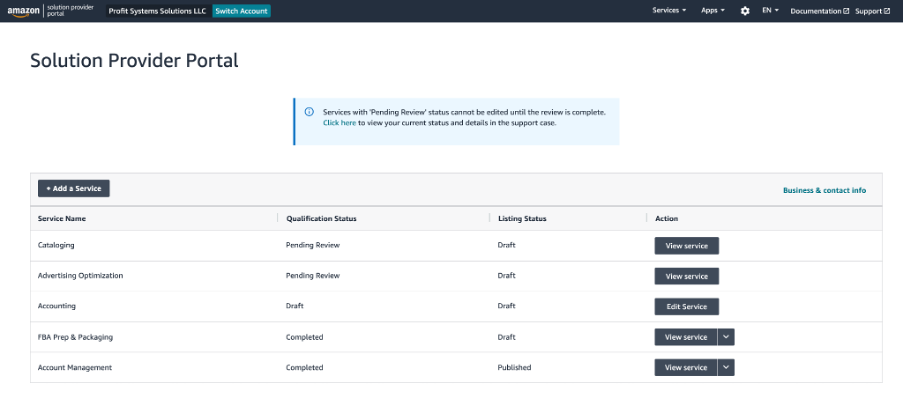
When a service listing shows a status of “Published,” you can request access to the Seller Central sections covered by that approved service.
Obtain Client Authorization
Open the published service listing you want to use for the client, click Edit, and copy the authorization code.

Send the authorization code to the client. The client must open it while signed in to their primary Seller Central account.
In Seller Central, the client will select the relevant marketplace and see an authorization screen similar to the one below.
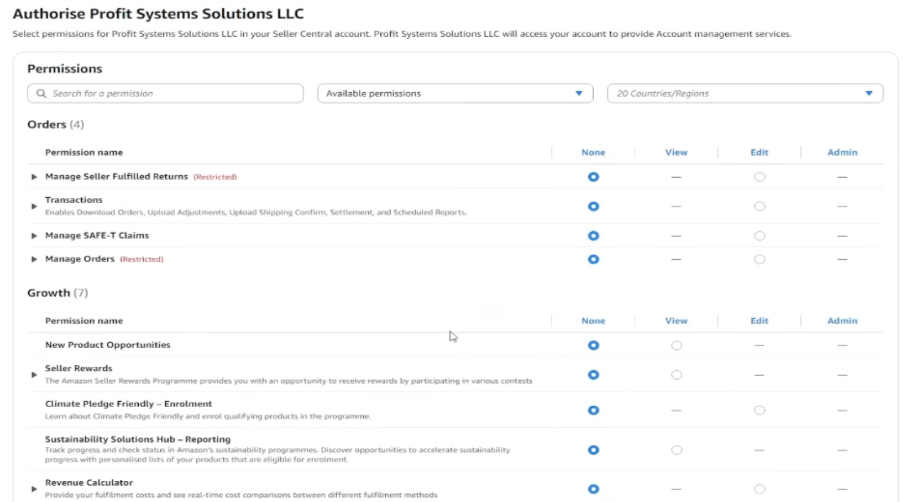
The client should select the required permissions and submit the request.
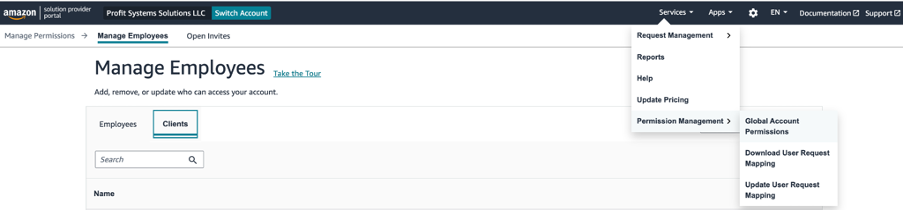
After submission, the client will appear in your SPP portal. Go to Services > Request Management > View All Requests.
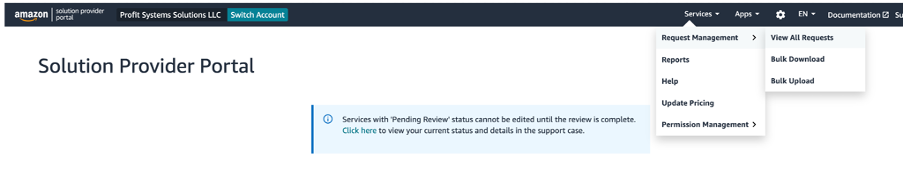
On the Request Management page, you will see the client’s request:

Click the Seller Account Name to open the request details.

Go to Change Status and select Order Confirmed if the client has been onboarded and the other status options do not apply. Then save changes.
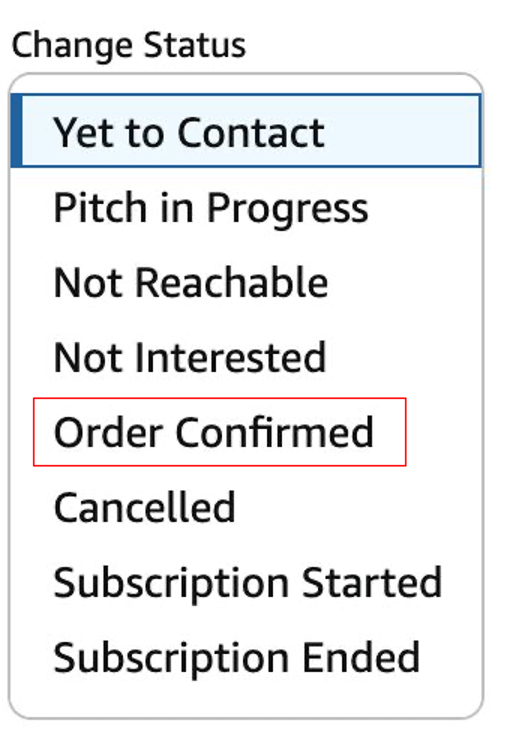
Once the status is updated, the client will appear under Services > Permission Management > Global Account Permissions in the Clients section.
How to Give a Team Member Access to a Client Account
- Go to Settings and select User Permissions.
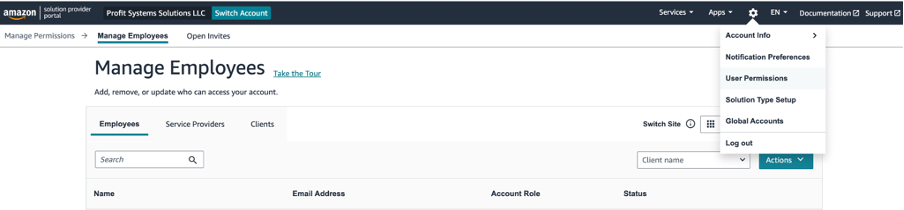
- Click Actions, then select Invite Employee.
- Enter the team member’s required details, including their name and email address.
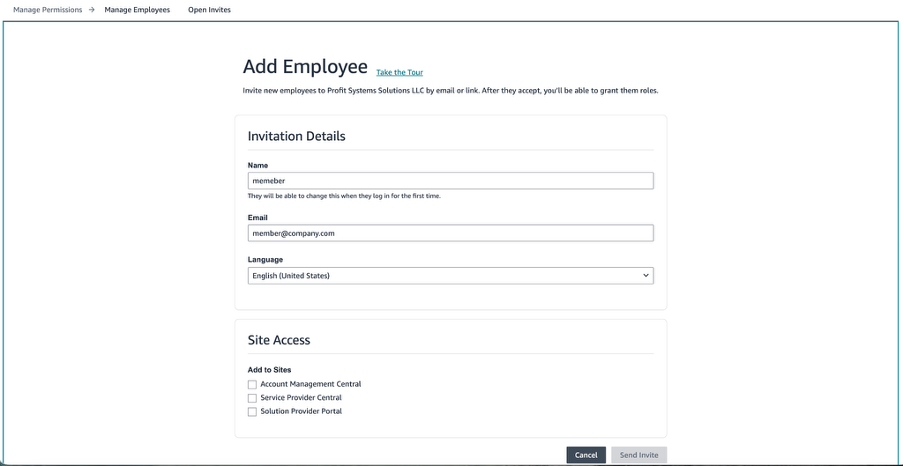
- Select the Sites and Services pages that the team member should be able to access.
Note: If you select Solution Provider Portal (and possibly Solution Provider Central), Amazon may require identity verification for the team member. Based on our experience, these pages are generally not required for a team member whose role is limited to performing services within a client’s Seller Central account.
Team Member Amazon Account Creation
- The team member will receive an invitation email containing links based on the pages you selected.
- They should open the relevant link and create their Amazon account.
- They will need an email address, password, mobile number for OTP verification (on Whatsapp), and QR-based two-factor authentication.
- After signing in through the invitation link, they should accept the invitation. The client account may not appear on that page because client Seller Central access is handled through the Seller Central login.
- After accepting the invitation, they can log out of that page.
Assign Client Access and Roles from the Agency Account
- From the agency account, go to Settings and open User Permissions. The team member should now appear as a contributor. Make sure you Selected the Relevant Site from ‘Switch Site’ dropdown.
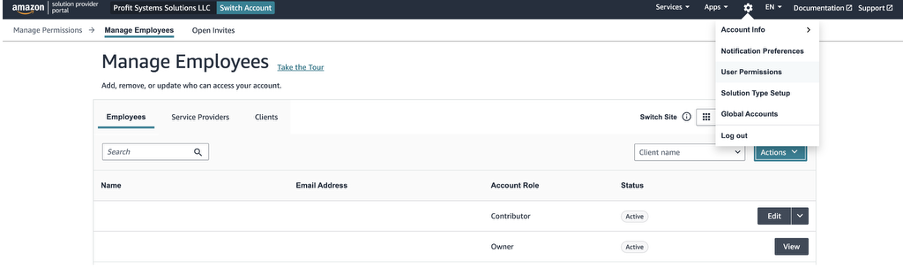
- Open the drop-down menu next to the team member and select Update Client Access.
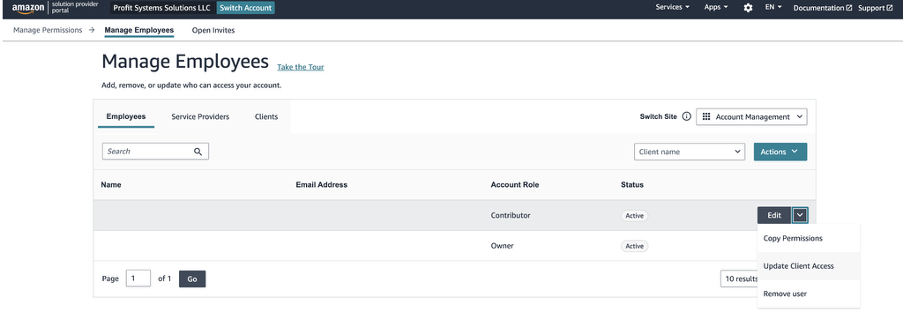
- Select the client you want to assign to the team member, then save the change.
- In User Permissions, open the Client Name drop-down and select the client account whose Seller Central permissions you want to assign. Also select the relevant site, such as Account Management, according to the services the team member needs to access.
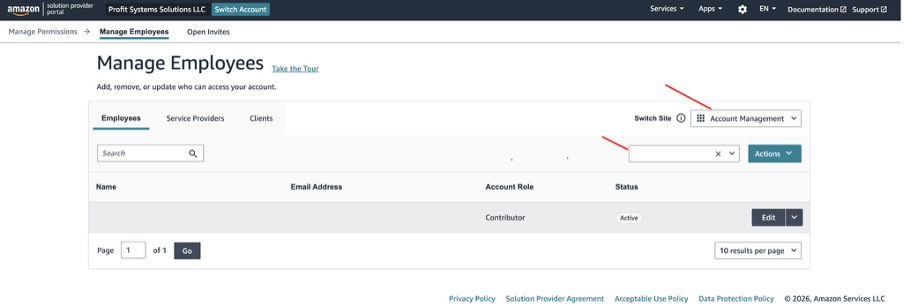
- Click the team member’s name or the Edit button to open their permissions page.
- On the permissions page, grant the required permissions and click Save.
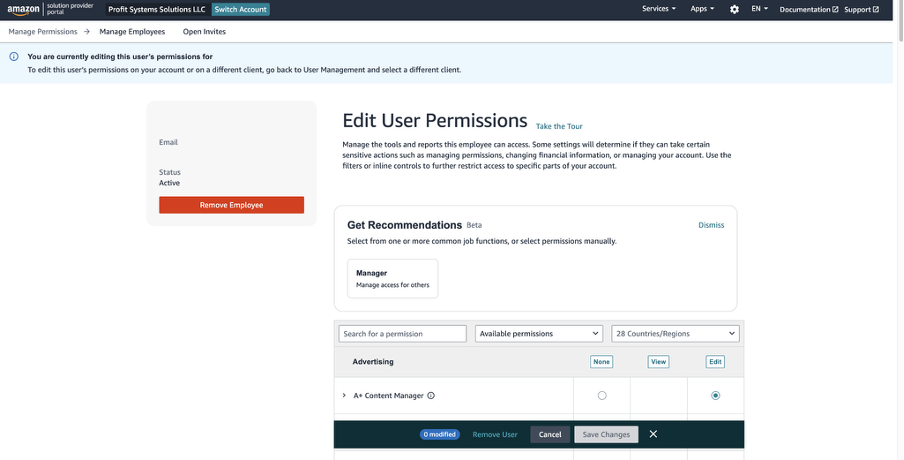
- The team member now has access to the client account and the Seller Central sections permitted by the assigned roles.
Access Seller Central
Once the team member has been assigned the required client and Seller Central permissions, they can access the client’s Seller Central account as follows:
- Open the appropriate Seller Central URL, such as sellercentral.amazon.co.uk, and sign in using the Amazon account created through the SPP invitation.
- After signing in, the agency name will appear, with the client account listed underneath it. Select the client account and the appropriate marketplace.
- The team member can now perform the work permitted by the assigned Seller Central permissions.
We hope this guide is helpful. Happy selling!
If you need help with selling on Amazon, feel free to contact us at: jalees@theprosys.com